Hello Bar

Saturday, December 22, 2012

Stick a Label on It

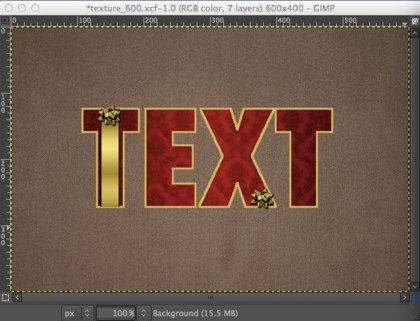
In this GIMP tutorial you will create an effect that appears similar to a strip of embossed tape as produced by some label makers.
 
 
Some of the things used in this project:
  • Layer Effects-Drop Shadow
  • Layer Effects-Bevel and Emboss
  • Path Tool
  • Merging layers
  • Selection by color
  • Text Tool
 
Note: To complete this tutorial, you will need to have the Script-Fu Layer Effects plugin installed. Get it here if you don't have it yet.

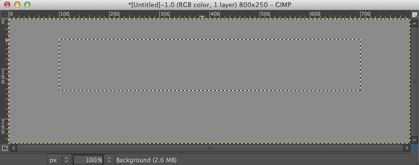
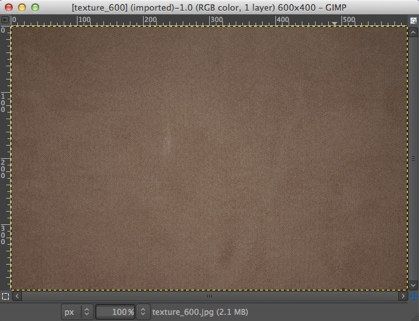
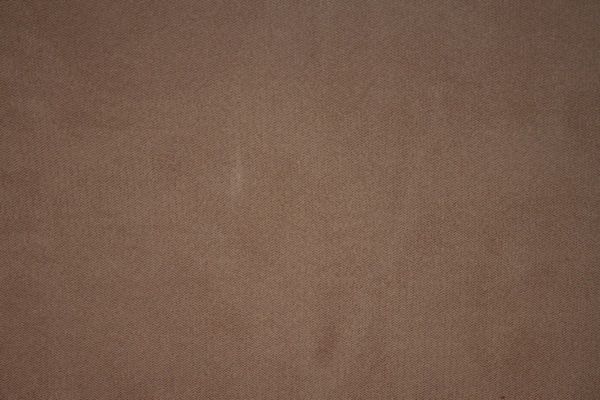
Create a new image 800 pixels wide by 250 pixels, File - New... . Set the foreground color to a medium gray (8b8b8b), then fill the image, Edit - Fill with FG Color.

With the Rectangle Select Tool, make a selection about 500 pixels by 100 pixels.


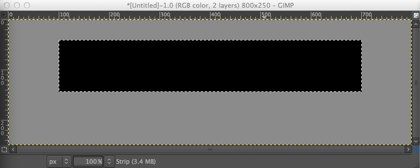
Make a new transparent layer, Layer - New Layer..., named Strip. Reset the color swatches to the default colors. Fill the selection on the Strip layer with the foreground color (black).


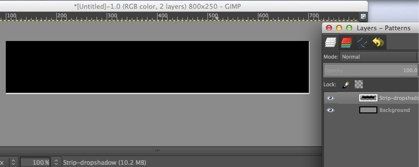
The next step is to add a white drop shadow to the strip. Script Fu - Layer Effects... - Drop Shadow... . Set the Color to white and the Size and Offset Distance each to 2.0.
 
Deselect, Select - None. Make the Strip layer active and merge it with the Script-dropshadow layer, Layer - Merge Down.
 
 
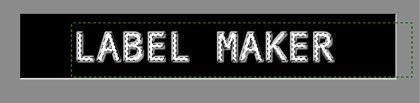
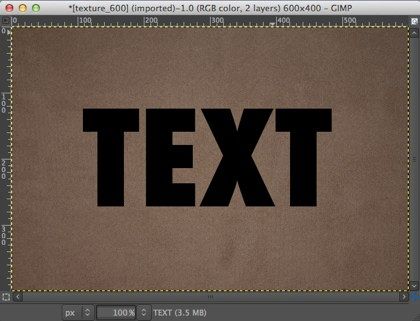
Click the Text Tool in the Toolbox. In the Tool Options, I used Monospace, 64, white. Click in the black strip and type a line of text.  With the Move Tool, position the text in the center of the black strip.

 
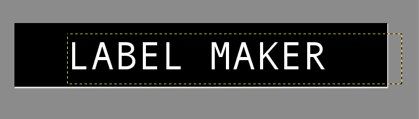
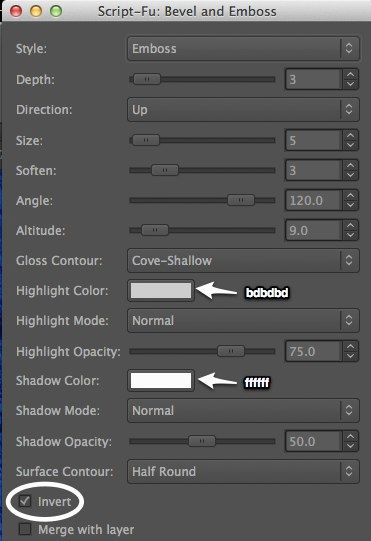
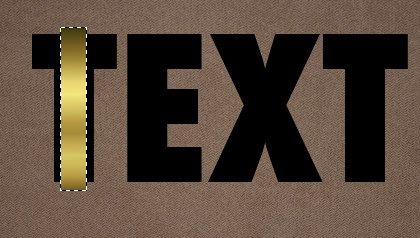
Use the Select by Color Tool and click anywhere in the text to select the white text. Apply the embossing effect, Script-Fu - Layer Effects - Bevel and Emboss… with the settings shown below.


Deselect. In the Layers pallet, select the upper of the two new layers created in the emboss process and merge it down to the lower layer. To the resulting layer, apply a slight blur, Filters - Blur - Blur.
 
 
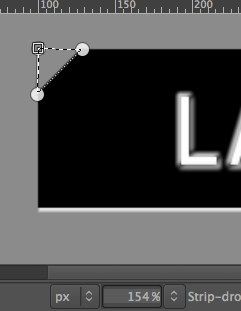
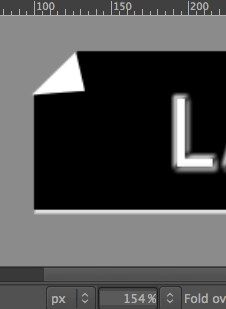
Get an even more authentic effect by 'folding down' a corner. 
 
Make the Strip-dropshadow layer active. With the Paths Tool (in Design mode), draw a triangle in the upper left corner of the black strip. In the Tool Options dialog, click the Selection from Path button. Delete the selected area, Edit - Clear.
 
 
Deselect everything. From the Paths pallet, delete the path you drew.

Make a new transparent layer, Fold over. Use the Paths Tool again to draw a triangle to represent the folded corner. Convert it to a selection.
 
 
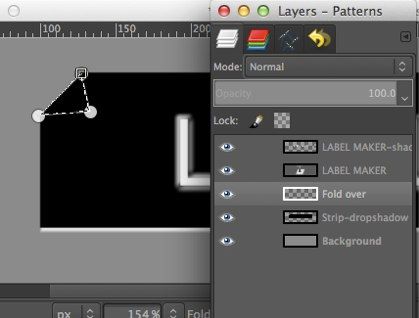
Fill the triangle with white, Edit - Fill with BG Color. Deselect, and delete the path.
 
 
Note: The Bevel and Emboss settings were determined after a lot of experimentation. You might improve the effect by further refining these settings.

Saturday, December 1, 2012

Carve the Text

In this quick, fairly simple GIMP project, you will create the effect of text having been carved into a textured surface using layers.


Some techniques you will use in this project:

Layers

Text layers

Merging layers

Selection by color

Alpha channels

Noise generator

Gaussian blur


Open a texture image as the Background layer. I used a marble texture that I downloaded from Image*Afterhere. Select the Text Tool and create a text layer with your desired text and center it. Use a bigger, bolder font. I chose Futura Ultra-Bold Condensed, 196 pt.


Create a new empty layer, Layer > New Layer…, name it Gray. Use the Bucket Fill Tool to fill it with a medium grayish-pink color. Drag it under the Background layer in the Layers pallet.

With the Text layer active, make a selection of the text. Use the Select by Color Tool and click on the text.


Hide the Text layer by unchecking its ‘eye’ icon in the Layers pallet. Select the Background layer and add transparency to it, Layer > Transparency > Add Alpha Channel. Clear the selection, Edit > Clear. The Gray layer should now be showing through the text.


Add a new layer, named Black. Invert the selection, Edit > Invert Selection. Reset the color swatches to their defaults, and fill the Black layer with black, Edit > Fill with FG Color.


Duplicate the Black layer, Layer > Duplicate Layer. Name the copy White. Fill the White layer with default white, Edit > Fill with BG Color.


Deselect all, Select > None.
With the White layer selected, choose the Move Tool, slide the White layer up slightly, one or two pixels.
Do the same with the Black layer, except move it straight down. (Note: I have exaggerated this a bit for clarity.)
Select whichever of the Black layer or the White layer is on top, then merge them together into one layer, Layer > Merge Down. Name the merged layer Shadow.


Apply a slight Gaussian blur with a radius of about 3.5 pixels to the Shadow layer, Filters > Blur > Gaussian Blur… . Drag the Shadow layer between the Background layer and the Gray layer.


Finally, add a little texture to the carved surface within the letters.
Select the Gray layer. Add some noise, Filters > Noise > Noise Generator. In the  dialog, click the Poisson tab, 1 Photon, Luminance noise only is checked, Gamma correction is not checked.


Apply a Gaussian blur with a radius of 2 pixels.


To extend the project, you might like to use the original textured background instead of the Gray layer. Make some slight brightness adjustments and apply a little blur.


Wednesday, November 28, 2012

Happy Holidays!!! A Text Project


In this GIMP project, you will use layers, strokes, and several other techniques to create a festive holiday text effect.
 
 
Resources you can download:
 
Open the background texture image as the Background layer.
 
 
Select the Text Tool and create a Text layer using a big, bold font. I used Futura Ultra-Bold Condensed, 196 point. Set the size of the Text layer to the size of the image, Layer > Layer to Image Size.
 
 
With the Rectangle Select Tool, make a selection on a vertical section of a letter.
 
 
Create a new layer, Ribbon. Select the Blend Tool and fill the rectangular selection with the preset Golden gradient.
 
 
Create another new layer, Ribbon edge. Apply a 1 pixel stroke to this selection, Edit > Stroke Selection…, Stroke line, Solid color. DeselectSelect > None


Select the upper of the two ribbon layers and merge them together, Layer > Merge Down.
 
Make the Text layer active and select the text by clicking anywhere on the black text with the Select by Color Tool. Invert the selection, Select > Invert. Now, with the Ribbon layer active, clear the part of the ribbon that lies outside the text, Edit > Clear.
 
 
You can now hide the Text layer by clicking the 'eye' icon in the Layers pallet.
Open the red damask image as a new layer, File > Open as Layers..., name it Damask. In the Layers pallet, drag the Damask layer between the Text and Ribbon layers. Add transparency to the Damask layer, Layer > Transparency > Add Alpha Channel. Clear the selection to remove the part of the Damask layer outside the text.
 
 
Invert the selection again so that you can paint a thin border around the text. Create a new layer, Text edgeUse the Color Picker Tool to choose a color from the middle of the gold ribbon (the Ribbon layer must be active). Select the Text edge layer, and from the Edit menu, choose Stroke Selection…, Stroke line, Solid color The width should be about 3 pixels. Deselect.
 
 
Open the gold bow image as a new layer and place it on top of all the others. Name it Bow.
 
 
You now need to shrink the bow down a lot. Choose the Scale Tool, grab a corner handle of the bounding box, and appropriately size the bow. Expand the Bow layer to the image size, Layer > Layer to Image Size
 
Make a selection from the Bow layer. With the Fuzzy Select Tool, click outside the bow, then invert the selection. You might want to zoom in to do this more easily.
 
Create a new layer, Bow shadow. Set the color swatches back to default colors and fill the selection on the Bow shadow layer with default black. Deselect. Apply a Gaussian blur with a radius of 2 pixels, Filters > Blur > Gaussian Blur… .
 
 
With the Move Tool, slide the Bow shadow layer a bit down and right. Drag the Bow shadow layer under the Bow layer. Merge the Bow layer down onto the Bow shadow layer.
 
 
Duplicate the Bow shadow layer, Layer > Duplicate Layer, and position the bows where you like.
 
 
You might want to add a horizontal ribbon, use bows of various colors, or different textures. Happy holidays!

Friday, September 21, 2012

Ghost in the Forest

By following the steps in this GIMP project you will see how to use layer blending modes and a variety of tools to create the effect of a ghost appearing in the forest.


Some of the concepts used in this project:

  • Adding an alpha channel
  • Desaturating an image
  • Cropping to a fixed aspect ratio
  • Using the Fuzzy select tool
  • Opening an image as a new layer
  • Using Layer masks
  • Using Layer modes
  • Selecting using transparency (Alpha to selection)
  • Stroking a selection


I used this image of a lady from stock.xchng as the basis for the ghost. The first step is to eliminate all the white background around the lady and replace it with transparency. Begin by using the Crop Tool to eliminate most of the background area.

Add transparency to the image, Layer > Transparency > Add Alpha Channel. Pick the Fuzzy Select Tool and click and drag forward in the background. This will select most of the white background without selecting anything within the lady herself. (You might want to use Quick Mask mode to be certain that no part of the lady is selected and to clean up your selection if necessary.)
Feather the selection about 5 pixels, Select > Feather... . Clear the selection, Edit > Clear.

Deselect, Select > None. Zoom in on the lady and use the Eraser Tool to manually clean up any remains of the white background around the edges of the lady.

Convert the lady to a black-and-white image, Colors > Desaturate... with Luminosity selected in the dialog. Select Brightness-Contrast... in the Colors menu. Slide the Brightness down to about -50 and the Saturation up to about 30 to give the image a darker appearance.

Now, fade out the lower part of her body. Add a white layer mask, Layer > Mask > Add Layer Mask... . With the Blend Tool, drag a FG-to-BG gradient (default colors) vertically from the bottom of the image to about the level of her waist.

Finally, scale the image to a height of about 850 pixels, Image > Scale Image... . Save and close the image of the lady.

Moving on to the forest image. As the source for the forest, I used this image, also from stock.xchng. The first step is to crop out a portion of the image with the Crop Tool, in the Tool Options, select Fixed Aspect Ratio of 5:8.
Resize the resulting image to a height of 1200 pixels, Image > Scale Image... .  


Open the previously saved image of the ghost lady as a new layer in the forest image, File > Open as Layers... .  Make sure the image and not the mask is active in the ghost lady layer. Use the Move Tool to position the lady where you like. Set the Layer Mode to Overlay in the Layers pallet. Reduce the Opacity to about 60%.


Duplicate the ghost lady layer, Layer > Duplicate Layer. Set the Layer Mode to Grain Merge and reduce the Opacity to about 25%. Apply a Gaussian blur with a Radius of 10 to the ghost lady copy layer, Filters > Blur > Gaussian Blur....


Add a soft glow around the ghost. Again, open the saved image of the ghost lady as a new layer. Rename this layer as glow. Delete the layer mask, Layer > Mask > Delete Layer Mask. Temporarily hide all the other layers by clicking the “eye” icon for each.


Now, to paint a white border around the lady. Select the image of the lady, Layer > Transparency > Alpha to Selection. Swap the default colors. Now stroke the selection, Edit > Stroke Selection..., Line width: 10 px. Clear the selection. Deselect.


Apply a Gaussian blur of 20 px. Unhide the other layers and use the Move Tool to position the glow layer around the ghost.


Swap the default colors back to black FG and white BG. Add a mask to this layer and fade it exactly as you did to the ghost lady layer earlier.


Experiment with various settings as you try out this lesson. Changing just a few things can dramatically affect the results you get. I hope you have fun playing around with this project.